Japanese Cheesecake
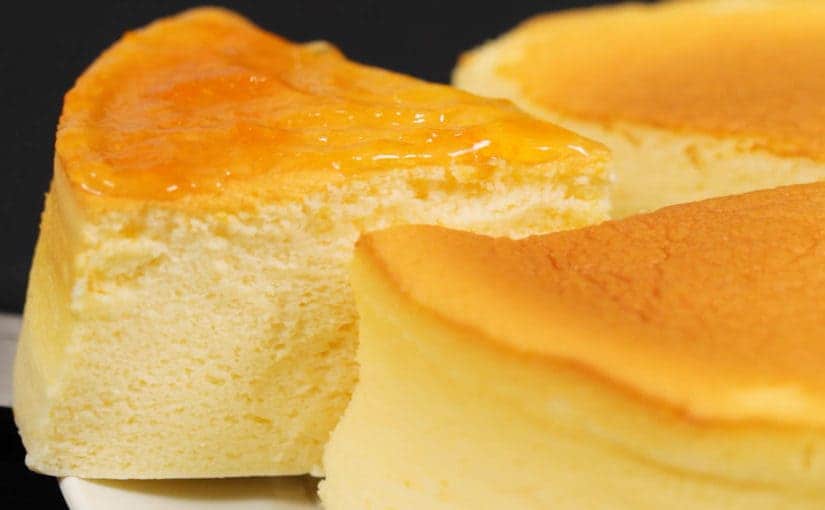
Light and fluffy, Japanese Cheesecake is a delicious gift for a real cheesecake lover. It’s a melt-in-your-mouth combination of creamy cheesecake and airy soufflé. A second (or more) serving is a guarantee!
Japanese Cheesecake has the tangy, creamy flavor of cheesecake, with the moist, cotton-soft texture of soufflé. It’s a match made in heaven.
Whether you or your holiday guests are big cheesecake fans or not, I promise this dreamy dessert will be a sweet surprise.
Watch How To Make Japanese Cheesecake
Light and fluffy, Japanese Cheesecake is a delicious gift for a real cheesecake lover. It’s a melt-in-your-mouth combination of creamy cheesecake and airy soufflé.
What is Japanese Cheesecake?
Japanese Cheesecake is very popular outside of Japan. If you get a chance to visit Japan, I highly recommend trying this cake when you are exploring all the foods the country has to offer.
But remember, there is no such thing as “Japanese Cheesecake” in bakeries in Japan. Usually, you will see 3 Types of Cheesecakes in Japan.
- Baked Cheesecake
- Rare Cheesecake
- Soufflé Cheesecake
Baked Cheesecake is the typical cheesecake. It has eggs, cream cheese, heavy cream, flour and it’s baked in the oven. Some may have a biscuit crust on the bottom, and some don’t.
Rare Cheesecake is a “no-bake cheesecake” outside of Japan. The cream cheese and heavy cream are mixed with gelatin or lemon juice, then poured over the biscuit crust, and cooled to set inside the refrigerator. Eggs are not used in this recipe. This version is often served with berries or other types of fruits.
SouffléCheesecake is the one you’re looking for.Soufflé Cheesecake originated in Japan and is widely known as Japanese Cheesecake or Japanese Cotton Cheesecake outside of Japan. It incorporates the egg whites into the cake mixture and baked in a bain-marie (water bath).
Get Ready for the Best Japanese Cheesecake
First, let’s go over the ingredients and equipment you will need to make this amazing cheesecake. I wrote this section for a beginner baker. If you bake often, please skip this section.
INGREDIENTS
Unsalted butter: When a baking recipe calls for unsalted butter or written as just “butter”, that means the salt is not required. As baking is chemistry, I highly recommend using unsalted butter because we don’t know how much salt is added in each brand of salted butter. Think of it this way: you can always add kosher salt to the butter but you can’t take it out from salted butter.
Eggs: An American large egg is about 50 grams without shell (56.7 g with shell).
Cream Cheese: Buy two Philadelphia Original Cream Cheese 8 oz. boxes instead of the round container type. You will need one full box (8 oz.) and 2.5 oz. from the second box (there is measurement on the package in case you don’t have a kitchen scale).
Heavy (Whipping) Cream: Heavy cream or heavy whipping cream is the richest type of liquid cream with a fat content of at least 36%. You can also go light and use whole milk in this recipe.
Granulated Sugar: I often receive questions about sugar whether you can use a substitute or reduce the amount of sugar. To be honest, I am not sure. As I mentioned before, the amount of sugar affects baking and my recommendation is to follow the recipe first before adapting so you will know what works and what does not. I use regular white granulated sugar for my baking unless stated otherwise.
Cake Flour: I use King Arthur cake flour blend, but if you don’t have the cake flour in hand, you can always make it yourself. All you need is all-purpose flour and corn starch. To get 1 cup cake flour, take one level cup of all-purpose flour, remove 2 tablespoons, then add 2 tablespoons of corn starch back in, and sift to combine.
Lemon: To me, it’s important to include the lemon juice for tanginess and the zest for wonderful aroma. If you don’t like “sourness”, don’t worry. The cake won’t taste sour. Just a hint will do the trick.
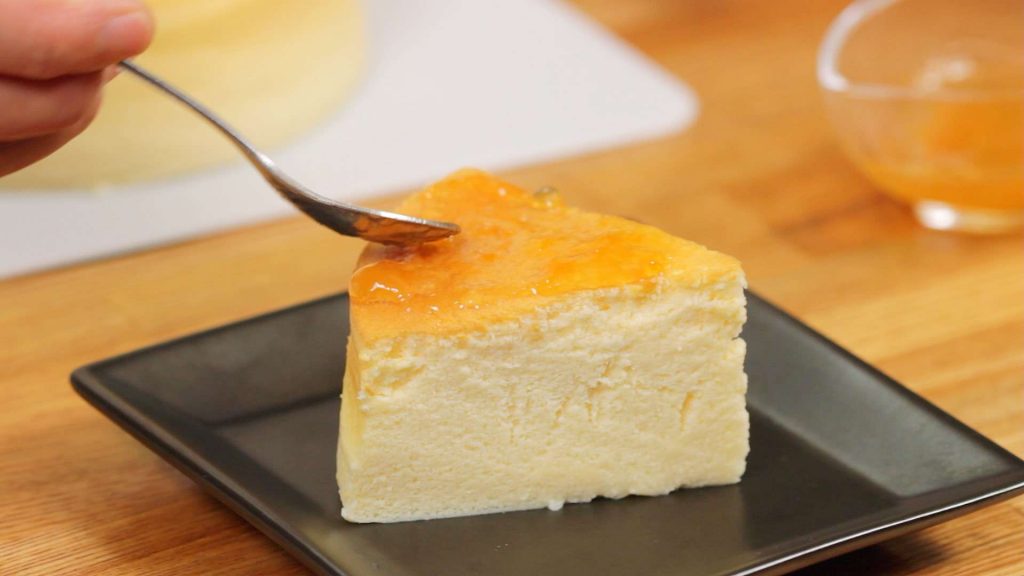
Apricot Jam: Typical soufflé cheesecake is covered with apricot jam. It gives the right amount of tanginess and sweetness as well as the sheer on the cake. I highly recommend getting a jar (my favorite brand is Bonne Maman).
EQUIPMENT
Cake Pan: I use this 9-inch cake pan with 4-inch height. If your 9-inch cake pan is not 4-inches tall, you can still use it with parchment paper to support the rising cake. If you have a smaller or bigger cake pan, please adjust the amount of your ingredients following below, which I used an egg as a unit of calculation.
- 1 large egg (50 g without shell)
- 50 g cream cheese
- 10 g unsalted butter
- 33 g (33 ml) heavy whipping cream
- 10 g granulated sugar
- 13 g cake flour
- 1 tsp. lemon juice + some zest
- 17 g granulated sugar for beating egg whites
I used to use a springform pan for my soufflé cheesecake, and most of the time I didn’t have any water seepage issue (I used a heavy duty 8″ long aluminum foil to secure). However, I discovered a better solution (read below) with this new cake pan, so now I don’t use my springform pan for this recipe.
Parchment Paper: You will need to pull out 30 inches of parchment paper. You will need one 30 inch x 4 inch (height of cake pan) sheet, and two 30 inch x 2 inch strips which are used to lift up the cake. To save time, I recommend this 9-inch round parchment paper liner for the bottom of the cake (because you’ll be making this cheesecake often!).
Mixing Bowls: You need 2 large mixing bowls for cake batter, and a third one to beat egg whites (or a stand mixer bowl if using a stand mixer).
Fine Mesh Strainer: It’s important to sift cake flour for a perfect texture. If you are going to make your own cake flour, then it’s even more important to have a fine mesh strainer. We also use it to pass through the cake batter to achieve an extra refined texture.
Whisk: I use a whisk (I love this one) instead of a silicone spatula to incorporate the air in the egg whites into the batter.
Stand Mixer or Electric Mixer: Have you beaten egg whites with hand? It’s a real work-out for your arm. I’ve done it before and let’s say I’m thankful for my stand mixer. You can use a hand mixer too; however, the speed level may be different, so trust your eyes.
Large Baking Sheet: You will need an oven safe container to keep your 9-inch cake pan inside along with 1 inch of water. I use a large baking sheet.
I know it looks a lot to prepare if you have never baked before, but these are pretty basic things you’ll need and will use a lot. And you’ll definitely make this cheesecake more than once! Let’s talk about techniques next.
10 Helpful Tips to Bake Japanese Cheesecake
The instructions for this cheesecake are pretty straightforward and simple, yet it’s not as easy as regular cheesecake. The common difficulties include shrinking and cracking, which are mostly caused by the outcome of beating egg whites or a wrong oven temperature.
I had enough share of trials and errors before I finalized this recipe. Even cheesecake loving Mr. JOC couldn’t take any more cheesecake in the house, so I started to pass the “taste okay but not perfect” cheesecakes to neighbors and friends. Besides the taste (easy part), my main issue was to work with my new oven.
1. Measure Everything First
It’s the basic of basic, but you must measure all ingredients and prepare everythingbefore you start making the cake.
Timing is so important. You don’t want to lose the perfect condition of the cake batter and egg whites just because you forget to line parchment paper for your cake pan or the oven hasn’t finished preheating yet.
2. Make Parchment Paper “Strips”
These strips of parchment paper are for pulling the cheesecake out of the cake pan after it comes out from the oven. Normally you will just flip and take the cake out, but it’s not so easy for a cake with soufflé-like texture.
I saw this trick from either a friend’s blog or Japanese website when I was still using a springfoam back then to make my soufflé cheesecake. As I received feedback on seepage issue from some of JOC readers, it was time for me to switch my cake pan and try this “strips” method. I’ve been absolutely loving it since!
3. Grease Well
We grease the inside of the cake pan so that the parchment paper will stick to it nicely. And you will also need to grease the parchment paper that will touch the cake batter.
If the cheesecake is stuck with the parchment paper while rising, the cake will be pulled and end up cracking.
4. Use Double Boiler
With my original Japanese Cheesecake recipe, I’ve always mixed the cream cheese, egg yolks, heavy cream, and sugar in a large mixing bowl without a double boiler and it worked fine.
However, I really prefer this double boiler method for one reason. You do NOT need to bring above ingredients to room temperature before making the cake!
For someone like me who forgets or plans last minute, this works in my favor. I usually forget to take out the ingredients from the refrigerator ahead of time and end up wasting time. If ingredients need to be at room temperature, don’t skip. It’s mentioned there for a good reason!
5. Use Cold Egg Whites
In Japan when we beat egg whites, we always use cold egg whites (even chill the bowl) to achieve a refined texture. When I started to bake in the U.S., I noticed American recipes call for room temperature egg whites to achieve the fullest volume instead. Maybe we look for different things? It’s up to you if you use cold or room temperature egg whites.
Also “cream of tartar” is not a common product in Japan and we do not use it when beating egg whites. So if you don’t have it in your kitchen, don’t worry (I don’t use it either).
6. Perfect Soft to Medium Peaks
This is the most important (and could be the scariest) part of making Japanese Cheesecake. The beaten egg whites generate small air pockets in the structure of the cake, keeping the cake airy and fluffy.
When you beat egg whites, there are 3 stages: soft, firm, and stiff peaks, and for this recipe, we need soft/medium peaks.
When you lift the whisk, the egg whites do not fold ribbons (drizzle) anymore. And when you turn your whisk upside down, the egg whites still cling to the whisk and hold their shape for a second, then start to “flop over”. That’s between soft and medium stage that we need.
I used to whip until firm to stiff peaks when I used my original recipe and it worked fine. However, once in a while when I whipped a tiny bit too much, the cheesecake became a bit lopsided and cracked. Overall, it was a bit harder to control. Many soufflé cheesecake recipes in Japan call for both stiff peaks or soft peaks, so find what works for you, knowing this variable.
7. Fold in Egg Whites
I learned that a whisk does a better job than a silicone spatula when you gently fold the egg whites into the batter. It’s very important to keep the small air bubbles so that the cake will rise higher without flopping.
8. Bake in Bain-Marie
A bain-marie (ban mah-REE) is the fancy term for a water bath. We use this cooking technique to cook delicate foods like soufflé and custards. The hot water create a gentle and uniform heat around the food as well as providing moisture inside the oven.
9. Bake at 2 Different Temperatures
The oven temperature is probably the second most important factor for a successful Japanese Cheesecake after beating the egg whites properly.
If the oven temperature is too high, the cheesecake will rise too fast, break the structure, and eventually crack. If the heat source is too close to the cake, the cake will also get big cracks. The taste will be fine, and after the cake cools down, the big cracks will be less obvious.
I preheat oven to 350F (180C) first, and this is not the temperature for baking the cheesecake. Every time you open the oven to set up bain-marie or put the cake into the oven, the temperature drops significantly. Therefore we set the oven higher.
Then when we put the cheesecake in the oven, we start baking at 320F (160C) and then reduce to 300F (150C) to make sure the cake is cooked through. My current oven is much bigger than my previous oven, and I had to test a few times to get the right baking time. If your oven is smaller than mine, you will probably need to reduce the baking time to 60 minutes. I have a “convection bake” option, but I used regular “bake” in this recipe so I could test the baking time for a majority of recipe users.
10. Cool Down Slowly
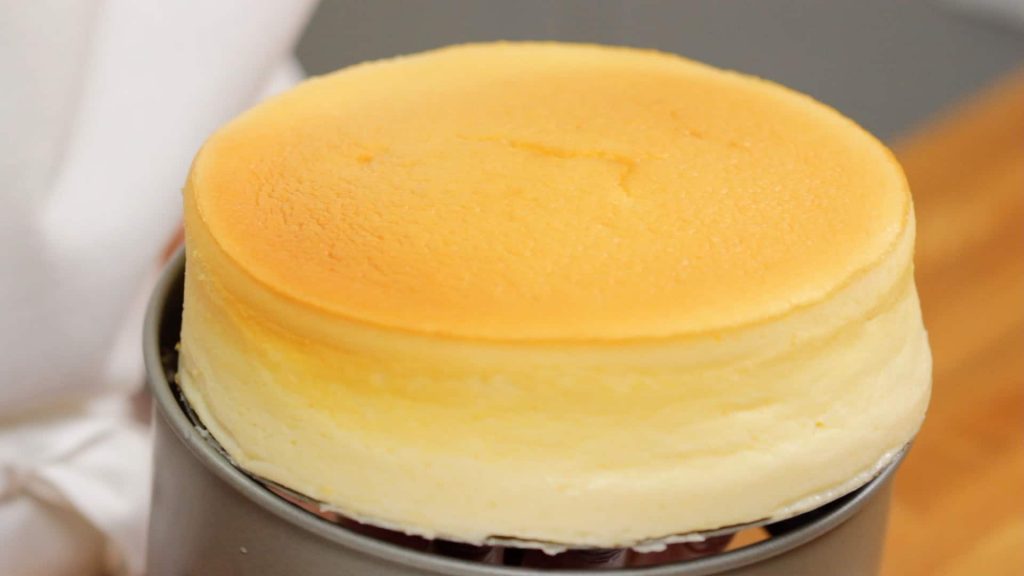
After baking in the oven, do not take out your cheesecake immediately. Let it cool down gradually by leaving the oven door ajar for a while.
This prevents a sudden change of temperature that could cause the cake to shrink or collapse. You want the cake to slowly come down to half the height, from 4 inch (tallest point) to 2 inch.
I hope you enjoy my Japanese Cheesecake recipe! If you make this recipe, snap a picture and hashtag it #JustOneCookbook. I love to see your creations on Instagram, Facebook, & Twitter! Thank you so much for reading and trying the recipes!